The next step is to Add a Gadget by pasting the BlogPatrol code into the appropriate area of your blog's template.
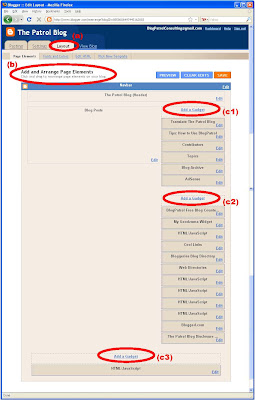
Screenshot 1 of 10: Click on one of the three (3) links titled by Blogger as Add a Gadget (formerly called Page Element), labeled in the screen shot below as (c1), (c2), and (c3). These three choices allow you to determine where to place the BlogPatrol counter widget on your blog.
(Click on the above image to see an enlarged view.)
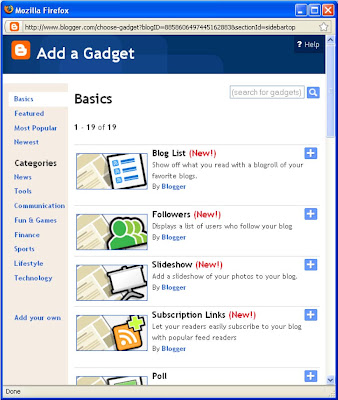
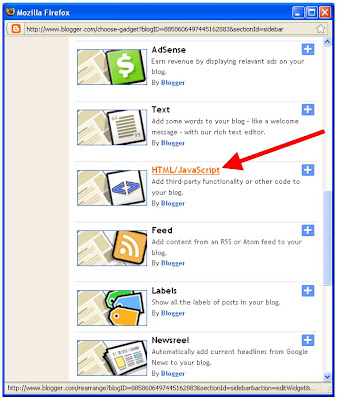
Screenshot(s) 2 of 10: A new browser window will appear with the heading Add a Gadget (see first screen shot below). Scroll down the list of gadget types until you see the one named HTML/JavaScript (Add third-party functionality or other code to your blog.) (see red arrow in the second screen shot below).
(Click on the above image to see an enlarged view.)
(Click on the above image to see an enlarged view.)
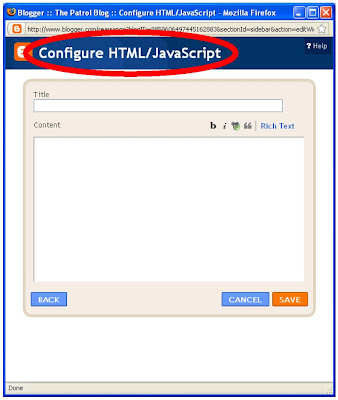
Screenshot(s) 3 of 10: Another new window will appear with the title Configure HTML/JavaScript (see red circle in the first screen shot below). The cursor is blinking automatically inside the Title field (see red arrow in the second screen shot below).
(Click on the above image to see an enlarged view.)
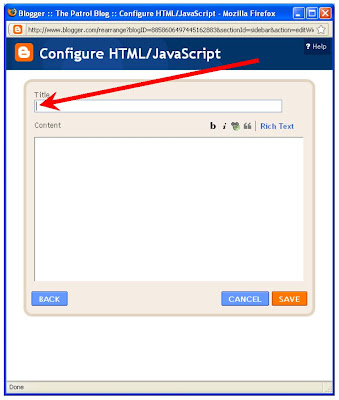
(Click on the above image to see an enlarged view.)
Screenshot 4 of 10: A Title, such as BlogPatrol Free Blog Counter, is optional (see red arrow below).
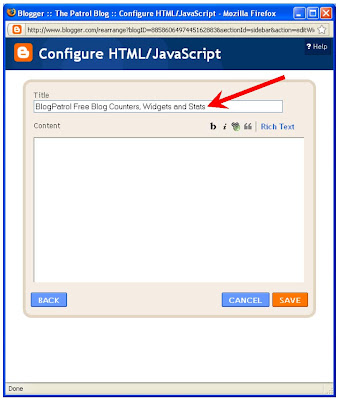
(Click on the above image to see an enlarged view.)
Screenshot 5 of 10: Click inside the box labeled Content so that the cursor is blinking inside it (see red arrow below).
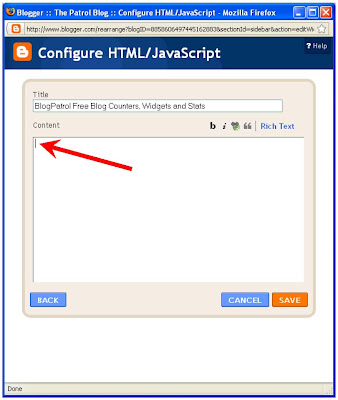
(Click on the above image to see an enlarged view.)
Screenshot 6 of 10: Now Paste the BlogPatrol code either by:
(a) by right-clicking your mouse (cursor) inside the Content box and selecting the word Paste, or
(b) using the Ctrl-V keyboard shortcut (pressing the CTRL key and the letter V key at the same time).

(Click on the above image to see an enlarged view.)
Screenshot 7 of 10:The BlogPatrol counter code will appear in the Content box (see red circle below).
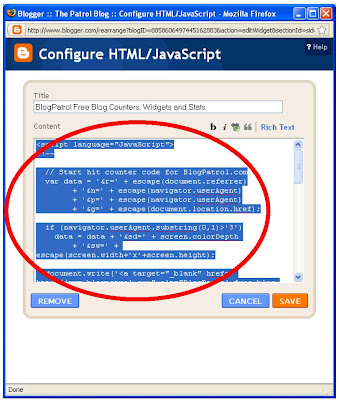
(Click on the above image to see an enlarged view.)
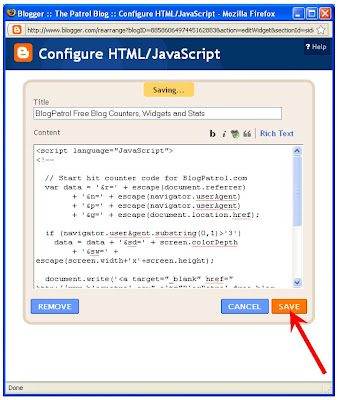
Screenshot 8 of 10: Click on the SAVE button (see red arrow below).
(Click on the above image to see an enlarged view.)
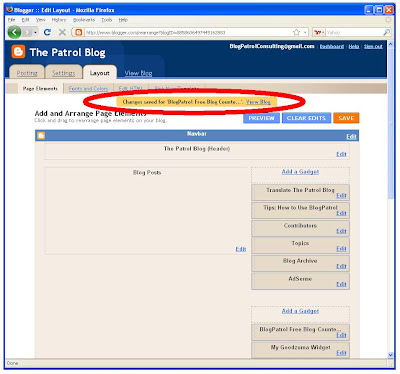
Screenshot 9 of 10: If the information saves successfully, the smaller browser will disappear automatically and you will get the message Changes saved for... in the middle center of the browser window logged into your Blogger account (see red arrow below).
(Click on the above image to see an enlarged view.)
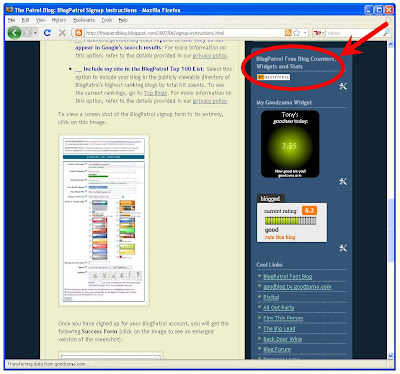
Screenshot 10 of 10: Click on the View Blog link to verify that everything is correct (see red circle / arrow in screen shot below).
(Click on the above image to see an enlarged view.)


